
Emergency Restoration of a Dislodged Crown and Core
Christopher A. Hooper, DDS
Clinicians seek to provide treatment as quickly and seamlessly as possible for every patient. Such treatments maximize patient schedules and optimize productivity, as well as ensure patient satisfaction and continued oral health.1 However, in certain cases, sometimes deemed emergencies, the emphasis on time and efficiency is even more critical. The following case details a situation in which a patient was visiting a resort near the author’s office, so time was of the essence in efficiently restoring a displaced crown before the patient’s departure. In facilitating a preparation and temporization procedure that produced precise clinical results in a fast, straightforward manner,2 new Protemp™ Crown Temporization Material (3M ESPE, St. Paul, MN) was instrumental in achieving high-quality functional and esthetic results. Protemp Crown has broad clinical applicability, providing superior results quickly for standard posterior restorative cases, as well as emergency repair cases such as the one outlined below.
CASE PRESENTATION
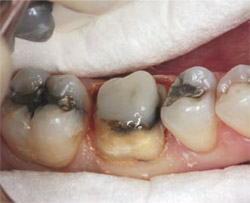
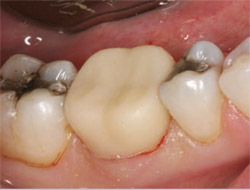
A 37-year-old patient with an unremarkable medical history and no contraindications to dental treatment presented with a dislodged crown and core build-up of tooth No. 30. The dislodged crown was lost, and unavailable for evaluation (Figure 1 and Figure 2). An initial examination revealed caries in the residual tooth structure. The patient reported that she did not have a strong relationship with her dentist; it had been several years since her last visit. Because no matrix was available to create a conventional custom Bis-acrylic temporary, this was an ideal situation in which to use Protemp Crown to quickly place a strong and esthetic temporary restoration.
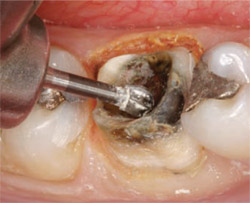
The tooth was prepared for a new Lava™ Crown (3M ESPE) using a chamfer bur to create a 360° chamfer margin, approximately 1 mm deep axially (Figure 3). A small amount of lingual gingival tissue was removed using a Sensimatic™ 600SE electrosurge (Parkell, Inc, Edgewood, NY), while maintaining proper biologic width of approximately 2.5 mm between the lingual margin and the alveolar bone,3 as well as providing a lingual axial wall with 2 mm of sound tooth structure4 apical to the planned core material5 (Figure 4).
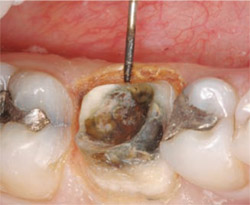
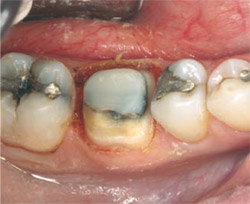
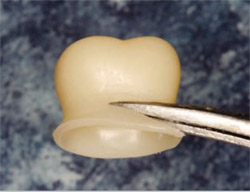
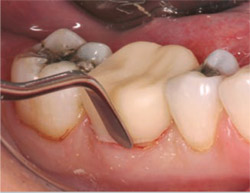
After the final excavation of caries (Figure 5), a composite resin material was used to build up the tooth preparation, using conventional dental bonding. Isolation was maintained using cotton rolls and gauze packing (Figure 6). After final preparation of the tooth (Figure 7), an impression was made using a polyether impression material with a posterior Triple Tray® (Premier Products, Co, Plymouth Meeting, PA). Fabrication of the temporary crown began by measuring the mesiodistal width of the preparation. The provided crown size tool and size selection chart were used to select the proper size crown.
After removing the crown from the package and removing the attached film (Figure 8), the crown was held under warm running water for about 15 seconds to soften. This is a modification to the manufacturer's directions that the author recommends to make the crown more malleable, facilitating its precise adaptability to the preparation.
Using sharp Iris scissors, the crown was trimmed to the approximate height (Figure 9) and placed on the prepared tooth (Figure 10). A stainless plastic instrument was used for final adaptation of the crown to the preparation (Figure 11), especially at the margins.
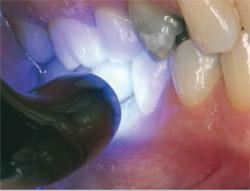
The patient was instructed to bite into occlusion for 2 seconds while the buccal surface was tack-cured (Figure 12), then instructed to open for curing of the occlusal and lingual surfaces (2 seconds each).
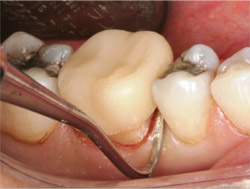
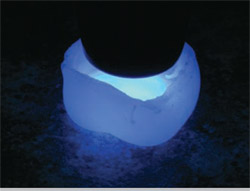
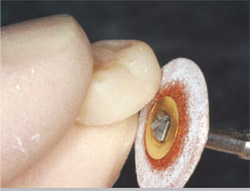
The crown was removed from the preparation using a conventional sickle scaler (Figure 13) and all surfaces were light-cured outside of the mouth for a total of 60 seconds (Figure 14). The crown was subsequently cleaned with alcohol and finished using a Moore’s disc (E. C. Moore, Dearborn, MI) (Figure 15), followed by polishing with Abbott-Robinson® Buff-Brite Polishing Wheels (Buffalo Dental Manufacturing Company, Inc, Syosset, NY). At this point, the crown was ready for placement (Figure 16) and was cemented with TempBond® (Kerr Corporation, Orange, CA).
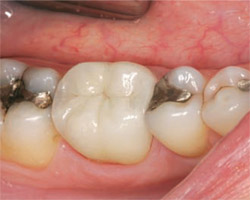
The patient returned to the office 1 week later for removal of the temporary and placement of a permanent Lava crown (Figure 17). In this case, placement of the final crown was expedited because of the patient’s limited schedule. Placement of the final restoration was very smooth and required virtually no occlusal or proximal adjustments, with no gingival bleeding. (Note the health of the soft tissue.)
CONCLUSION
In this case, what could have been a vacation nightmare was handled quickly and efficiently. The patient was surprised by the speed and efficiency of the entire procedure, particularly the quick and simple placement of the temporary crown. She arrived with little coronal tooth structure and, less than 45 minutes later, walked out of the office with tooth No. 30 fully prepared for a definitive restoration, and protected with a high-quality provisional. One week later the final crown was placed and the treatment was completed.
The efficiency of Protemp Crown is noteworthy in this procedure. It is quicker to make the temporary in this manner as opposed to hand-carving, or trying on multiple polycarbonate or ion crowns, grinding to fit the margins, and relining with acrylics. The author has found that Protemp Crown is much faster than using a polycarbonate crown and fits better with greater esthetics than an ion crown. While other procedures can take 15 minutes or more, Protemp Crown significantly decreases the time required, taking between 2 to 4 minutes. The time-savings this procedure offers, as well as the fit, esthetics, and favorable gingival response, make it an ideal solution for posterior temporaries.
References
1. Burke FJ, Murray MC, Shortall AC. Trends in indirect dentistry: 6. Provisional restorations, more than just a temporary. Dent Update. 2005;32(8):443-452.2. Wassell RW, St George G, Ingledew RP, Steele JG. Crowns and other extra-coronal restorations: provisional restorations. Br Dent J. 2002;192(11): 619-630.
3. Maynard JG Jr, Wilson RD. Physiologic dimensions of the periodontium significant to the restorative dentist. J Periodontol. 1979;50(4): 170-174.
4. Goodacre CJ, Campagni WV, Aquilino SA. Tooth preparations for complete crowns: an art form based on scientific principles. J Prosthet Dent. 2001;85(4):363-376.
5. Christensen GJ. When to use fillers, build-ups or posts and cores. J Am Dent Assoc. 1996;127(9):1397-1398.
6. Wassell RW, Smart ER, St George G. Crowns and other extra-coronal restorations: cores for teeth with vital pulps. Br Dent J. 2002;192(9): 499-509.
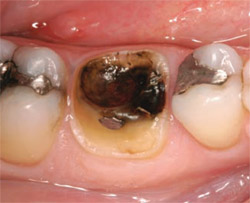 | 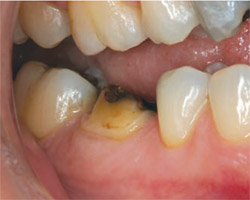 | |
| Figure 1 The patient presented with a dislodged crown and build-up on tooth No. 30. | Figure 2 The dislodged crown; build-up and decay revealed. | |
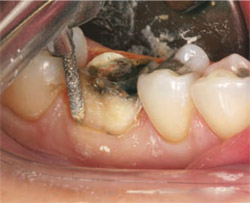 |  | |
| Figure 3 Tooth preparation. | Figure 4 Removal of gingival tissue, preserving biologic width. | |
 |  | |
| Figure 5 Final excavation of decay. | Figure 6 Core build-up of preparation. | |
 |  | |
| Figure 7 Completed preparation and build-up. | Figure 8 Proper size Protemp Crown selected. | |
 |  | |
| Figure 9 Crown trimmed to approximate height. | Figure 10 Try-in of crown. | |
 |  | |
| Figure 11 Adaptation of crown to the preparation. | Figure 12 Tack-cure of buccal surface. | |
 |  | |
| Figure 13 Removal of crown from preparation. | Figure 14 Bench-cure outside of the mouth. | |
 |  | |
| Figure 15 The crown was trimmed and polished. | Figure 16 Placement of Protemp Crown. | |
 | ||
| Figure 17 Postoperative view; final Lava Crown placed. | ||
| About the Author | ||
 Christopher A. Hooper, DDS Christopher A. Hooper, DDSPrivate Practice Virginia Beach, Virginia | ||

