
Placement of an Implant-Supported Bar With Locator® Bar Attachments
The Locator® Bar Attachment system by Zest Anchors, Inc (Escondido, CA), has been designed to provide three attachment options for the fabrication of a splinted cast alloy bar or milled titanium bar supported by endosseous implants.
A threaded titanium Locator Bar Female is available for the technique of drilling and tapping into an implant bar, allowing for future retrieval. The Locator Laser Bar Female is another option that is manufactured in both titanium for laser welding to a titanium bar and in stainless steel for laser welding onto a cast gold alloy bar. The third fabrication alternative is using the stainless steel Locator Cast-To Bar Female that can be waxed into a bar pattern and cast to with a gold alloy.
All three styles of the Locator Bar Attachment feature a self-locating design, low vertical height, and long-lasting retention. A choice of various color-coded retentive elements allows the overall retention of the bar-retained overdenture to be adjusted to the needs of the patient.
CLINICAL CASE
The patient for this featured restoration had six implants placed in the mandibular arch for the purpose of a bar-splinted overdenture (Figure 1; Figure 2; Figure 3; Figure 4; Figure 5; Figure 6; Figure 7; Figure 8; Figure 9; Figure 10; Figure 11; Figure 12; Figure 13; Figure 14). The cast alloy bar was designed to demonstrate the use of all three types of Locator Bar Females (cast-to, laser welded, and threaded). Any one of these attachment techniques can be used independently. A total of four attachments were evenly spaced along the bar.
CONCLUSION
The successful fabrication of the bar using all three types of Locator Bar Females demonstrated that any of these currently popular fabrication techniques by the dental laboratory can be used with confidence. The patient was pleased with the secure fit and retention that the Locator Attachments provided for their overdenture.
Clinical case and photographs by Allen L. Schneider, DDS, Springfield, VA. Dental laboratory work and photographs by Hermanson Dental Lab, St. Paul, MN.
DISCLAIMER
The preceding material was provided by the manufacturer. The statements and opinions contained therein are solely those of the manufacturer and not of the editors, publisher, or the Editorial Board of Inside Dentistry. The preceding is not a warranty, endorsement, or approval for the aforementioned products or services or their effectiveness, quality, or safety on the part of Inside Dentistry or AEGIS Communications. The publisher disclaims responsibility for any injury to persons or property resulting from any ideas or products referred to in the preceding material.
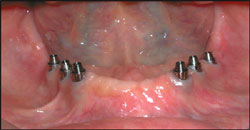 | 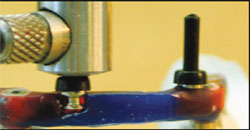 | |
| Figure 1 The implants were fitted with fixed detachable bar abutments provided by the implant manufacturer. | Figure 2 Using a Paralleling Mandrel to position a Cast-To Bar Female into the waxed bar pattern. | |
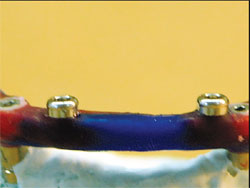 |  | |
| Figure 3 Two Cast-To Bar Females were waxed into the anterior portion of the bar pattern. | Figure 4 Careful devesting of the gold alloy casting protected the Locator attachments from damage. | |
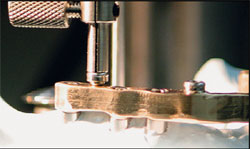 |  | |
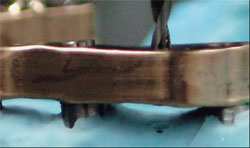
| Figure 5 A Paralleling Mandrel was used to position the Laser Bar Female and tack-weld it into place. | Figure 6 A bead of weld was flowed into the machined indentation on the stainless steel Laser Bar Female. | |
 | 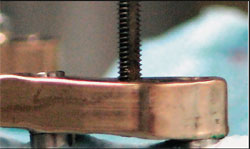 | |
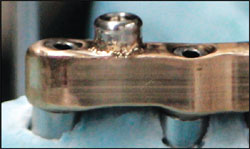
| Figure 7 A 1.7-mm Locator Bar Drill was used to make an exact hole to a depth of 2.8 mm for tapping the site. | Figure 8 Internal threads within the site were created using the Locator 2.0-mm Bar Tap in a drill chuck. | |
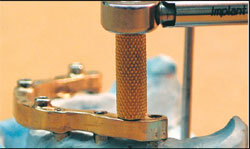 | 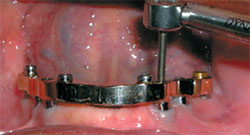 | |
| Figure 9 The Locator Bar Female was threaded into the tapped hole and tightened with a torque wrench. | Figure 10 The completed bar was delivered to the patient and tightened into place with a torque wrench. | |
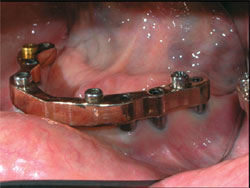 | 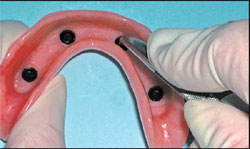 | |
| Figure 11 A mirror view of the bar with all three types of Locator Bar attachments. | Figure 12 After polishing the underside of the overdenture, the Black Processing Males were removed from the metal housings with a Locator Tool. | |
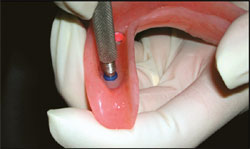 |  | |
| Figure 13 The final retentive liners were snapped into the empty metal caps with the Locator Tool. | Figure 14 A secure fit of the overdenture was accomplished with the four Locator Bar Attachments. |

