
Restoration of an Immediately Placed Implant With the Thommen Spi® Easy Abutment in the Esthetic Zone
Robert L. Schneider, DDS
Replacement of a failed tooth and its root with a dental implant placed at the time of extraction has several benefits in the esthetic zone.1,2 The maintenance of the hard and soft tissues is one of the main advantages, as is the time saved in treatment of the patient as well as the elimination of the need for a removable provisional prosthesis. Traditionally, this has been a challenging endeavor because of the complexity of previous implant systems and the number of components involved. Coordinating the “implant team” is also very important. The restorative dentist, oral surgeon, and the dental technician must all function as a cooperative unit for optimal success in the outcome of the case.
Today much of the focus of implant dentistry is on immediate implant placement and provisionalization.3-5 Under many conditions, the success rates of immediately placed implants are very similar to the traditional delayed placement approach.3 There will always be instances when there are contraindications to immediate implant placement, such as: the presence of an active infection; adequate bone architecture does not exist to achieve adequate stabilization of the implant at placement; or, for various reasons, the oral surgeon is unable to place the implant in the exact position desired by the restorative dentist and technician for optimal restoration. Under any of these circumstances it is beneficial to have an alternate plan for provisionalization, such as a provisional acrylic resin removable partial denture, an Essex-type provisional, or other alternatives.
The following patient presentation will illustrate immediate implant placement, abutment attachment, and provisional restoration with the Thommen SPI®EASY abutment system (Thommen Medical USA, LLC, Cleveland, OH).
CASE PRESENTATION
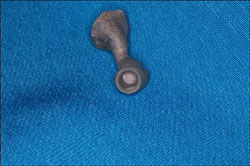
The patient was an 82-year-old man who presented with a vertical root fracture on a tooth that had been restored many years previously with a post and core and porcelain-fused-to-metal (PFM) restoration along with the rest of his maxillary dentition (Figure 1). His medical history was unremarkable. To extract the tooth and fabricate a long-span fixed partial denture was not an acceptable treatment option to the patient. In consultation with the dental technician and oral surgeon it was decided to extract the tooth and attempt an immediate implant placement, abutment placement, and provisionalization.
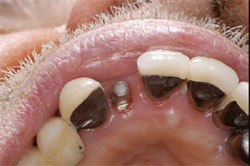
The tooth was atraumatically extracted and the socket contours and anatomy were checked to make sure the facial cortical plate was intact and not compromised (Figure 2 and Figure 3). A 4.2-mm x 12.5-mm Thommen SPI®ELEMENT implant (Thommen Medical) was very carefully placed into the extraction socket to the desired depth with a torque of at least 35 Ncm, and it exhibited no clinically detectable mobility (Figure 4).
The EASY abutment (4.5 mm, long cone), designed for cemented restorations, was put in place with the accompanying abutment screw and torqued to 25 Ncm with the Thommen SPI®MONO torque ratchet (Thommen Medical). The EASY abutment was selected because it is manufactured in varying gingival collar heights, so placement of the finished cement margin can be planned for optimal soft tissue health and easy removal of cement. The EASY abutment, abutment screw, EASY impression cap, EASY analog, EASY protective/provisional cap, one EASY burn-out cap for crowns (anti-rotation element), and one EASY burn-out cap for bridges (no anti-rotation element) are supplied in a prepackaged kit (Figure 5).
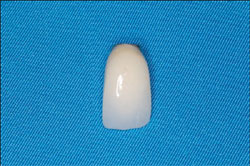
A polymethyl methacrylate (PMMA) protective/provisional component can be directly placed on the EASY abutment and used as the base for fabrication of a custom provisional using a thermoplastic matrix made from the diagnostic cast before extraction (Figure 6). In this case, standard PMMA of an appropriate shade was loaded in the matrix and placed in the mouth for polymerization. After polymerization, additional PMMA was bead-brushed into the provisional to obtain the optimal contours and emergence profile (Figure 7). After contouring and polishing the provisional, it was cemented with provisional cement.
When the tissue is adequately healed, the provisional can be removed and the final impression can be made with a custom or stock tray with the enclosed one-piece plastic snap-on impression cap filled with a standard polyvinyl siloxane impression material (Figure 8). When the final impression is removed from the mouth, the enclosed EASY laboratory analog can be placed in the impression coping and the master cast poured in a high-strength, low-expansion dental stone. Many individuals use a soft tissue moulage material when pouring the master cast. With today’s implants, the top of the implant is placed only 3 mm to 4 mm subgingivally, so the author prefers to contour the gypsum of the master cast gingiva with a sharp surgical blade or acrylic bur and instruct the laboratory to fabricate a restoration with an optimal emergence profile that will be very similar to the provisional and follows what was developed on the master cast. Of course, a custom impression coping is always an option but the time and effort can be somewhat prohibitive.
The definitive restoration is then fabricated using routine laboratory procedures (Figure 9A; Figure 9B; Figure 9C). The plastic waxing/burn-out component is unique in that it has a small internal indentation that retains it on the laboratory analog in a small depression. This retention component is very helpful to the technician during waxing because the pattern is stable. After casting, the technician does not have to remove a gingival ring or other extensive structures to seat the casting. All that is required is a laboratory stone or carbide laboratory bur to remove the small positive in the casting to fit it to the analog.
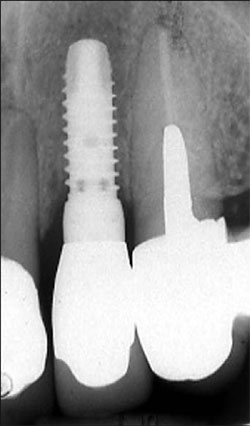
For this patient, a PFM restoration was used. When the restoration was adjusted and ready for cementation, a cotton pellet was placed in the access hole of the EASY abutment (Figure 10). The final PFM restoration was cemented with a routine crown and bridge cement (Figure 11). A radiograph was taken before cementation to verify complete seating of the restoration and to establish a baseline for future recall examinations (Figure 12).
CONCLUSION
Immediate implant placement and provisionalization in the esthetic zone is a very desirable treatment under the proper conditions. A concerted team effort and excellent communication is necessary to facilitate the most predictable results. More predictable management of the soft and hard tissues of the patient may be experienced by the patient and practitioner with well thought out team planning.
ACKNOWLEDGMENT
The author would like to thank Dr. Richard Burton for his surgical expertise and contributions to the patient treatment and also to Mr. Kraig Ceynar, CDT, for his laboratory skills in the treatment of this patient.
References
1. Kan JY, Rungcharassaeng K, Lozada J. Immediate placement and provisionalization of maxillary anterior single implants: 1-year retrospective study. Int J Oral Maxillofac Implant. 2003;18(1): 31-39.2. Wohrle PS. Single-tooth replacement in the aesthetic zone with immediate provisionalization: fourteen consecutive case reports. Prac Periodontics Aesthetic Dent. 1998;10(9):1107-1114.
3. Degidi M, Plattelli A, Gehrke P, et al. Clinical outcome of 802 immediately loaded 2-stage submerged implant with a new grit-blasted and acid-etched surface: 12 month follow-up. Int J Oral Maxillofac Implant. 2006;21(5):763-768.
4. Jaffin R, Kumar A. Berman CL. Immediate loading of implant in partially and fully edentulous jaws: A series of 27 case reports. J Periodontol. 2000;71(5): 833-838.
5. Romanos GE. Present status of immediate loading of oral implants. J Oral Implantol. 2004; 30(3): 189-197.
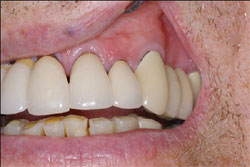 | 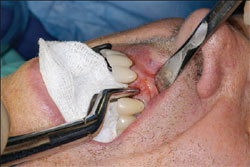 | |
| Figure 1 The patient's preoperative condition before extraction of the maxillary left lateral. | Figure 2 Extraction of the tooth. | |
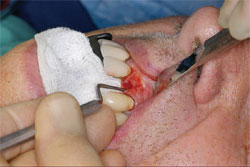 |  | |
| Figure 3 Evaluation of the condition of the socket and facial cortical plate. | Figure 4 Placement of the implant to the proper depth with a torque ratchet to 35 Ncm. | |
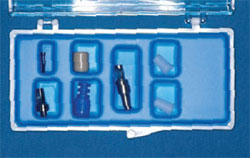 | 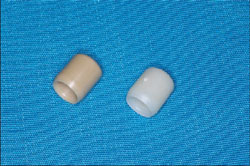 | |
| Figure 5 The Thommen SPI®EASY abutment set. | Figure 6 The EASY PMMA provisional cap (right), and the EASY protective cap (left). | |
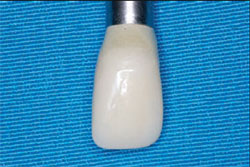 |  | |
| Figure 7 The fnished PMMA provisional was polished on the laboratory analog and is now ready for cementation. | Figure 8 The snap-on impression cap on the EASY abutment. | |
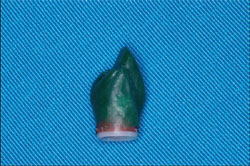 |  | |
| Figure 9A The PFM coping waxed after the cut-back. | Figure 9B The PFM coping cast with sprue attached. | |
 |  | |
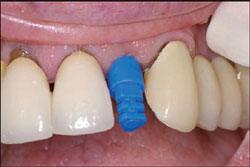
| Figure 9C The PFM coping with porcelain applied. | Figure 10 The EASY abutment in place with a cotton pellet in the access space. | |
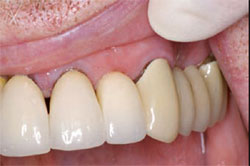 |  | |
| Figure 11 The final restoration was cemented. | ||
| Figure 12 The radiograph of the seated restoration. | ||
| About the Author | ||
 Robert L. Schneider, DDS Robert L. Schneider, DDSUniversity of Iowa Hospitals and Clinics Hospital Dentistry Institute Division of Prosthodontics Iowa City, Iowa | ||

