New Changes in CAD/CAM: Part 1
Paul Feuerstein
CAD/CAM—computer-aided design/computer-aided manufacturing—has been around for a long time. It has been used in industrial manufacturing for many years, creating everything from tiny parts, such as nuts and bolts, to very large parts, such as aircraft wings. Medical devices and automobiles are designed using CAD/CAM programs.
When the term CAD/CAM is mentioned in terms of dentistry, the immediate current association is CEREC® (Sirona, Charlotte, NC). After 20 years on the market, this product has made its mark on the profession. Until CEREC, the limiting factor for that type of sophistication in dentistry was the size and cost of the equipment. A typical machine shop spends over a quarter million dollars and gives up quite a bit of floor space for CAM machines. In May 1984, Francois Duret, DDS, applied for a patent that he titled, “Method of and Apparatus for Making a Prosthesis, Especially a Dental Prosthesis” (US Patent #4,663,720). The patent was granted in May 1987, and Duret followed up by writing an article on automated prosthetic production.1 In 1989, he brought a system to the Chicago Midwinter Meeting and did a live demonstration of a computer-manufactured restoration.2,3 It took about 4 hours to complete that procedure, and the equipment was large and expensive.
Sirona took this concept and shrunk it both physically and economically to fit into a dental office. In many cases, the quality of a properly designed restoration created from an excellent preparation with CEREC can rival the fit of traditional laboratory-processed restorations. The obvious patient advantage is the possibility of receiving a final restoration in one visit in large part by eliminating the impression-taking and temporary fabrication steps that lead to the need for a second visit. It also allows the patient to have a metal-free restoration with properties rivaling traditional laboratory-processed inlays, onlays, and ceramic crowns. Now, 20 years later, new materials have been developed that allow restorations to be milled out of premade solid blocks for use with this system.
Where Do We Go From Here?
While Sirona could be considered the pioneer in dental CAD/CAM technology, over the past 20 years other manufacturers have followed in the company’s CAD/CAM footsteps. Several of these innovations are described below.
D4D Technologies
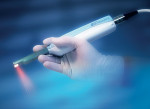
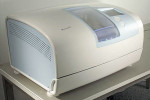
A new dental office CAD/CAM system, E4D Dentist, is currently being developed by D4D Technologies (Richardson, TX) and will be exclusively distributed by Sullivan-Schein (Melville, NY). This system is different in that it uses a laser scanner (the IntraOral Digitizer, Figure 1) that does not depend on reflective materials, such as powder, for accurate scanning. The software provides intuitive design tools, such as automatic margin detection, and allows the operator to make modifications to contacts, occlusion, anatomy, die space, and other parameters if desired. It also has the capability of fabricating temporaries for patients who require additional visits or are in an emergency situation. The milling unit (Figure 2) is fast, built to accommodate current restorative materials, and it can easily be adapted for new materials. A nice feature is that if a tool breaks, it is automatically changed. Final validation beta tests were ongoing at press time.
Sirona
Sirona’s latest version of its software, as well as a new milling machine, is scheduled to be introduced at this year’s Chicago Midwinter Meeting. The software will be more automated than before, which should help the operator to feel more confident of accepting the computer’s design right away. The powder, although not completely eliminated, will be lighter and a lesser amount will be required. The new milling system also will be much faster and more accurate. Units can be completed in 3 to 7 minutes instead of 10 to 20 minutes; thus, with the new software and milling capabilities, it will be possible to have the restoration in the patient’s mouth 10 to 15 minutes after the handpiece is put down.
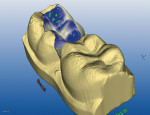
Many practitioners have investigated the various incarnations of CEREC and will surely look at the new E4D when it becomes available. Because CEREC has been totally redesigned (Figure 3) and E4D offers some new features, it behooves the dentist to take a fresh look at these and other CAD/CAM units.
But is there another level to achieve? What does the future hold for CEREC? What if CEREC could be connected to one of these larger CAM units that could create restorations out of materials never considered before? Certainly cutting blocks of gold or titanium are feasible, but what about denser ceramics or tooth-colored materials that could not be milled chairside because of their physical properties?
Sirona has been testing a system of exporting the scanned file to laboratories that have CEREC inLab. In October 2006, Dr. Eric Martin and Nick Ragle, CDT, of Ragle Dental Lab in Champaign, IL, conducted an experiment at the Sirona Event in Las Vegas, just prior to the American Dental Association (ADA) meeting. Dr. Martin scanned several preparations in his office and e-mailed them to the laboratory. According to laboratory owner Jerry Ragle, at the laboratory they were easily able to get the scanned files into the inLab system and output inlays and crowns within minutes. They found that the advantage was in the finish that they could achieve—polishing, glazing, and staining. While any dentist could certainly do this, many prefer to concentrate on the clinical aspects of restorative dentistry and leave the esthetic creativity to a trusted laboratory partner, even though it does not take advantage of the single-visit benefit.
Nobel Biocare
Dentists who do not use the CEREC in-office system still have access to the CAD/CAM manufacturing technology and these new materials. A traditional impression can be sent to a dental laboratory, where the model will be scanned and copings, frames, or complete restorations will be constructed. The earliest entry was Procera® (Nobel Biocare™ USA, Inc, Yorba Linda, CA), which allowed a laboratory to send a model to a scanning center. The scan was then electronically transferred to a CAD/CAM unit that created a coping out of an extremely strong alumina ceramic. This coping was then sent back to the laboratory, where porcelain was built over the coping in the same manner as a traditional porcelain-fused-to-metal. Nobel Biocare later introduced a small, less expensive scanner, the Procera® Piccolo, which allowed the laboratory to do its own scans, reducing turnaround time. Nobel also now offers a zirconia coping in addition to the original alumina. Several other laboratory systems have since appeared and will be described in Part II of this series.
A few companies are currently developing and releasing in-office scanners. In addition to eliminating the impression, they will also allow the electronic transfer of a model to a laboratory that has a CAD/CAM system. Currently, it seems that the strategy is to have the dentist scan a preparation and arches in the office and then send them electronically to a “clearinghouse” that will give the dentist and the laboratory the option of either making a physical model with or without a coping design, or to create the coping itself.
New Intra Oral Scanners—Without the In-office fabrication
Cadent
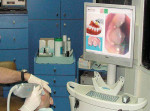
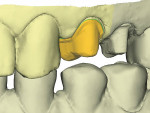
Cadent (Cadent, Inc, Carlstadt, NJ) introduced its intraoral scanner, iTero™, at the ADA meeting in October 2006. The unit includes a computer, software, wand, and a built-in air compressor. The latter is used to send a stream of air over the lens to prevent fogging, while the overspray keeps the preparation somewhat dry. Because of the method of image acquisition—using a strobe and color camera— the preparation does not have to be sprayed with any reflective powder. According to the manufacturer, among iTero’s major advantages is that it does not require the teeth to be coated; users are encouraged to place the probe directly on the teeth. The three-dimensional (3-D) file is then processed and sent over the Internet to Cadent’s facilities, where they have rapid prototyping machines capable of creating models for use by any dental laboratory, or a CAD/CAM file that can be made directly into a coping. The coping and model can be sent to the dentist’s preferred laboratory for traditional finishing. The obvious advantages are that there is no waiting for mail or laboratory pick-up and there are no models to be poured or impressions to be analyzed. The dentist can immediately see the quality of the “impression,” and there is no worry about such issues as impression pulls or other distortions (Figure 4, Figure 5, Figure 6).
Brontes Technologies
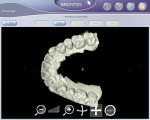
Brontes Technologies (Lexington, MA) was founded by two engineers from the department of mechanical engineering at the Massachusetts Institute of Technology. Under the leadership of Eric Paley and Micah Rosenbloom, a team of engineers and support personnel was created for the purpose of developing a unique scanner. They decided to use a video stream as opposed to individual still images, and developed a 3-D system capable of scanning anything from a single tooth to a full arch. Although the system is still being fine-tuned in the development and testing stages, it has already captured some attention (Figure 7). In October 2006, 3M ESPE (St. Paul, MN) acquired Brontes. This will allow 3M ESPE to participate in both sides of the impression marketplace and also to offer both traditional and new digitally based solutions for impressioning. According to Tom Engels, Vice President, Oral Care Business Development of 3M ESPE, “the Brontes acquisition is additional proof that we believe in the future of digital dentistry and the important role intraoral scanning will play in restorative and orthodontic dentistry.” Brontes receives access to 3M ESPE’s research and development and marketing resources to help drive further development and commercialization when the system is ready to be unveiled. It is noteworthy that 3M ESPE already has its own CAD/CAM laboratory product, the Lava™ Crowns and Bridges system. The possibility of sending the scanned file directly from the dental operatory to a Lava machine opens a new avenue for in-office scans. 3M ESPE has an orthodontic division, 3M Unitek, which could also benefit from this technology. The Lava system aside, 3M ESPE is not a novice in the dental in-office CAD/CAM system marketplace; the company is one of the manufacturers of the blocks used in the CEREC systems as well as in the upcoming E4D systems.
Densys Ltd
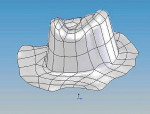
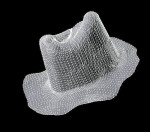
Densys Ltd (Hefer, Israel), as of the writing of this article, has finalized its wand design and is beginning clinical trials. According to the company’s founder, Moshe Ernst, Densys is concentrating on the accuracy and ease of acquisition of the image. The initial entry will be a scanner that will export the files to partner laboratories who will continue the CAD/CAM process (Figure 8 and Figure 9).
Hint-ELs
Hint-ELs® (Griesheim, Germany) states that it will have an intraroal scanner soon with a product called DirectScan. An announcement is expected at the 32nd International Dental Show meeting being held in March 2007 in Cologne, Germany.
Conclusion
Why would a dentist want to get involved in this arena? One common reason is the elimination of the traditional impression technique. No patient will ever say that they love having all of that “goo” in his or her mouth. Sure, the materials have been improved with better viscosity, flavor, smell, and speed, but an optical impression is very attractive. Beyond the patient experience is the accuracy of what is sent to the laboratory. It is unfortunate to see some of the impressions that a laboratory has to try and read. There are missed margins, material pulls, bubbles, and voids.
Impression material manufacturers and clinical teachers have done everything possible to simplify the process but there will always be times when clinicians, for whatever reason, miss that impression. The optical scan is instantly read and, as the software is developing, alerts the dentist to flawed areas and allows for correction. In some systems, multiple optical impressions can be merged to create one perfect impression.
Beyond this, ultimately the laboratories will be able to go directly to the newer CAD/CAM dental materials without an impression. This will shorten the manufacturing time, as delivery will be as fast as one can click a mouse. Or, if they are so equipped, laboratories can take the digital file and, with the push of a button, have a working model ready with no bench time. Laboratories that are not so equipped can still use the digital models, as companies or partners of the scanning manufacturers will create them.
While these systems are developing, several laboratory products are appearing in the marketplace. These complex CAD/CAM machines are creating restorations that should yield extremely accurate fits and more durability. These will be examined in next issue’s continuation.
Acknowledgment
The author would like to thank Eliezer Ganon of Columbus, Ohio (www.designtechnologygizmo.com), for his help in contacting the manufacturers and gathering much of the information discussed here.
Disclosure
The author is a consultant for Brontes Technologies.
References
1. F Duret, JL Blouin, B Duret. CAD-CAM in dentistry. J Am Dent Assoc.1988;117:715-720.
2. Weiss R. Chips, bytes, and new technology. The Washington Post. January 10, 1989; page z.12.
3. Associated Press. This is not a drill. The Palm Beach Post. February 25, 1989; page 7B.
About the Author
Paul Feuerstein, DMD
General Practice
North Billerica, Massachusetts


